Maintenance
Any industry that puts employees behind the wheel carries real road-safety risk. Human error causes 94% of serious traffic accidents, but that still leaves 6% down to other factors — often avoidable ones like a faulty system or a broken part. A thorough pre-trip inspection before a driver heads out is one of the most direct ways to close that gap. This guide covers what a pre-trip inspection is, what it should include, how to run one with ToolSense fleet management software, and how to make sure your drivers actually follow the CDL pre-trip inspection checklist with the right tools.

Key Facts
- A thorough pre-trip inspection should be done on any vehicle before it hits the road.
- This ensures that the vehicle is in working order, increases the driver’s safety, and lowers maintenance costs in the long run.
- Depending on whether a driver is checking a CDL Class A, B, or C vehicle, different components of the vehicle need to be checked before every trip.
- Examples from a pre-trip inspection checklist might include suspension parts, coupling, brakes, wheels, emergency equipment, lights, and windshield wipers.
- Pre-trip inspection software offers checklists and the ability to create custom forms to ensure drivers don’t forget a single detail during the pre-trip checks.
What Is a Pre-trip Inspection?
A pre-trip inspection is the check a driver runs on a vehicle before it goes out on the road. The point is simple: confirm the car, truck, or other vehicle is in working order so you avoid both expensive repairs and traffic accidents. Catching a malfunction, failure, or broken part during these checks means it gets repaired or replaced before the vehicle leaves the yard — which keeps the driver safe and stops a small flaw from turning into extensive, costly damage later. Inspections apply to trucks, their trailers, and other vehicles used on public roads, such as tractors.
Driving commercially requires a specific license. In the United States that license is a CDL (Commercial Driver’s License); the UK, Australia, and New Zealand have equivalents. The minimum age for a CDL is 18 in the US, though drivers must be at least 21 for interstate commerce, in the state of Hawaii, or when transporting hazardous materials. The CDL splits into three classes, and each one calls for a different pre-trip inspection.
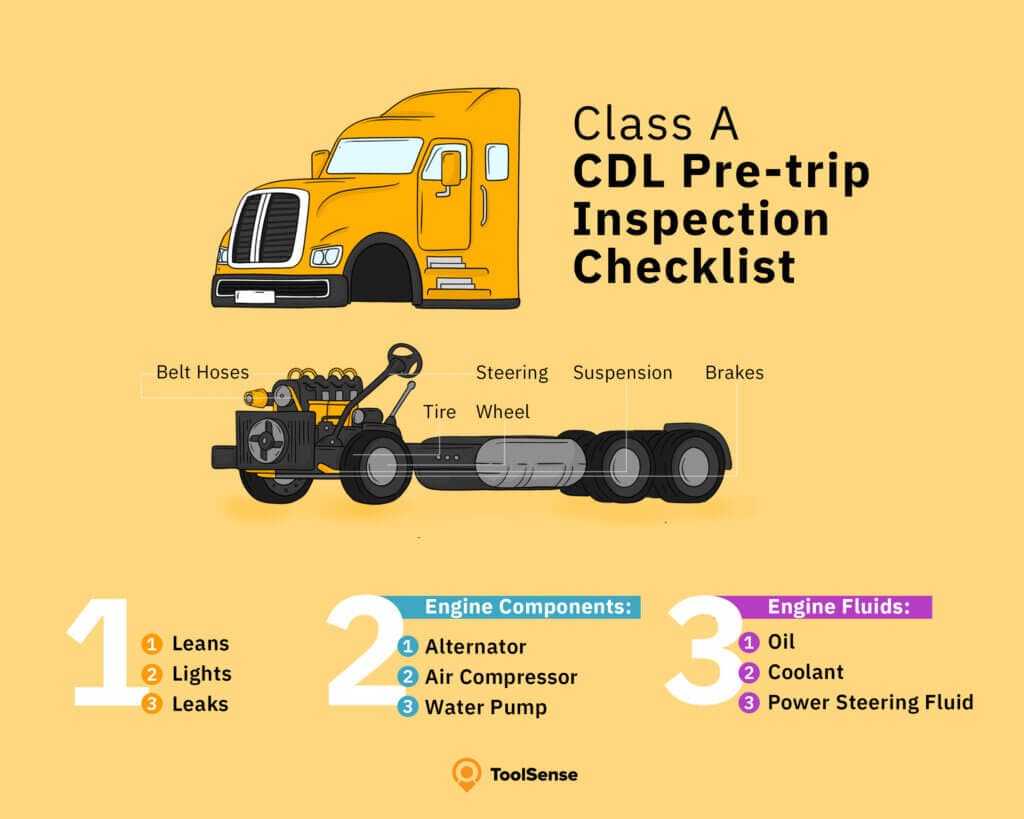
Class A Pre-trip Inspection
CDL Class A covers a combination of vehicles with a gross vehicle weight rating (GVWR) of 26,000 pounds when the towed vehicle weighs over 10,000 pounds. That includes tractor and trailer combinations, truck and trailer combinations, double and triple trailers, livestock carriers, tractor-trailer buses, flatbed trucks, and any vehicle that falls under Class B and C. Every vehicle in this category needs a Class A pre-trip inspection.
Class B Pre-trip Inspection
CDL Class B covers vehicles with a GVWR of over 26,000 pounds and vehicles towing a trailer of up to 10,000 pounds — straight and box trucks, delivery vehicles, large buses, and trucks with small trailers. A Class B holder can also drive Class C vehicles. Every vehicle in this category needs its own pre-trip inspection.
Class C Pre-trip Inspection
A CDL Class C lets drivers operate any vehicle that transports 16 or more passengers, the driver included. Under the Hazardous Materials Transportation Acts, a Class C holder can also operate vehicles designed to carry hazardous materials, including small HAZMAT vehicles and passenger vans.
Minimum Pre-trip Inspection Requirements
Each class has its own requirements, shaped by the type of vehicle and what it’s carrying. A pre-trip inspection checklist helps drivers remember which components apply to their specific vehicle. At a minimum, every pre-trip inspection should cover the following.
Service Brake, Including Trailer Brake Connections
Inspect the brake systems on both the towing vehicle and the trailer — an undetected fault here is a serious hazard. The brake hose should be securely mounted on both ends and not leaking air; any cracks, splits, or cuts mean it needs to be replaced or repaired. The brake chamber should not leak air either. Check the slack adjusters and push rods: push rods should have less than 1 inch of play and stay at a 90-degree angle to the brake chamber. Brake pads should show no oil or debris and keep a minimum thickness of 1/4 inch.
Parking Brake
Confirm the parking brakes on both the vehicle and the trailer hold by setting the brake and releasing it.
Steering Mechanism
The steering gearbox, air lines, and hoses should show no damage or leaks, with hoses connected on both sides. The steering shaft should be straight and intact. The rubber on the drag link should be properly greased and free of splits or cuts. Check that all pins and bolts on the pitman’s arm are secure. Per the Class A pre-trip inspection checklist, tie rods should be secure and show no signs of being bent or broken, and the steering wheel should be firmly attached to the steering column.
Lighting Devices and Reflectors
Lights and reflectors belong on every pre-trip inspection checklist, so check them before each trip to confirm they’re intact and working:
- Running lights
- High and low beams
- Turn signals
- Hazard and warning lights
- Brake lights
- License plate lights
- Reflectors
Tires and Rims
Make sure no unauthorized wheel rims are in use. Tires should be free of cuts, abrasions, and bulges, evenly worn, and at a minimum tread depth of 1.6 mm. Check air pressure, and confirm the valve stem is securely in place and not leaking air. Lug nuts should show no rust or cracks. The axle seal should be secure and leak-free.
Horn
Check the horn in every pre-trip inspection so it works when it’s needed in an emergency.
Windshield Wipers
Trivial as they seem, windshield wipers are part of every Class A pre-trip inspection checklist. Confirm the wipers and fluid supply work, and top up the washer fluid.
Rearview Mirrors
No CDL pre-trip inspection cheat sheet is complete without rearview mirrors. They should all be intact, clean, and free of cracks or damage, and properly aligned.
Coupling Devices
When the vehicle is coupled to a trailer, the truck pre-inspection has to include the coupling devices. Air connectors need to be connected on both ends with no tangling, dragging, or damage — the same goes for the electrical lines, and the safety latch must be in place. The fifth-wheel platform cannot carry unauthorized welds and should show no cracks or damage. Inspect the glad hands to confirm the seals are in good condition and not leaking air, and check that mounting bolts are tight. The skid plate should be properly greased and the release arm secure in a fully locked position. The kingpin should be firm and secure with no cracks or damage, the locking jaw intact and locked securely around it. The apron should be mounted and secured with no cracks, and the sliding fifth-wheel locking pins fully locked.
Emergency Equipment
Safety and emergency equipment belongs on every pre-trip inspection list. Confirm the truck carries a working fire extinguisher, spare electrical fuses, and reflective triangles.
CDL Pre-trip Inspection Checklist
Tractor, bus, and truck pre-trip inspection checklists vary by vehicle type. With ToolSense you can create custom forms and checklists. Here’s an example of what a printable pre-trip inspection checklist might look like:
1. Passenger Side Engine
- Drivers should check the air filter housing and verify that it is mounted securely, and the cover is in place.
- The windshield washer fluid reservoir should be filled to an appropriate level and show no leaks.
- The turbocharger does not leak oil or exhaust.
- The engine air duct is working, has properly secured clamps, and shows no cuts.
- Truck drivers need to inspect the alternator to see that it is securely mounted and does not have broken or loose wires.
- The accessory drive belt should not be cracked or frayed.
- The air conditioner compressor is securely mounted.

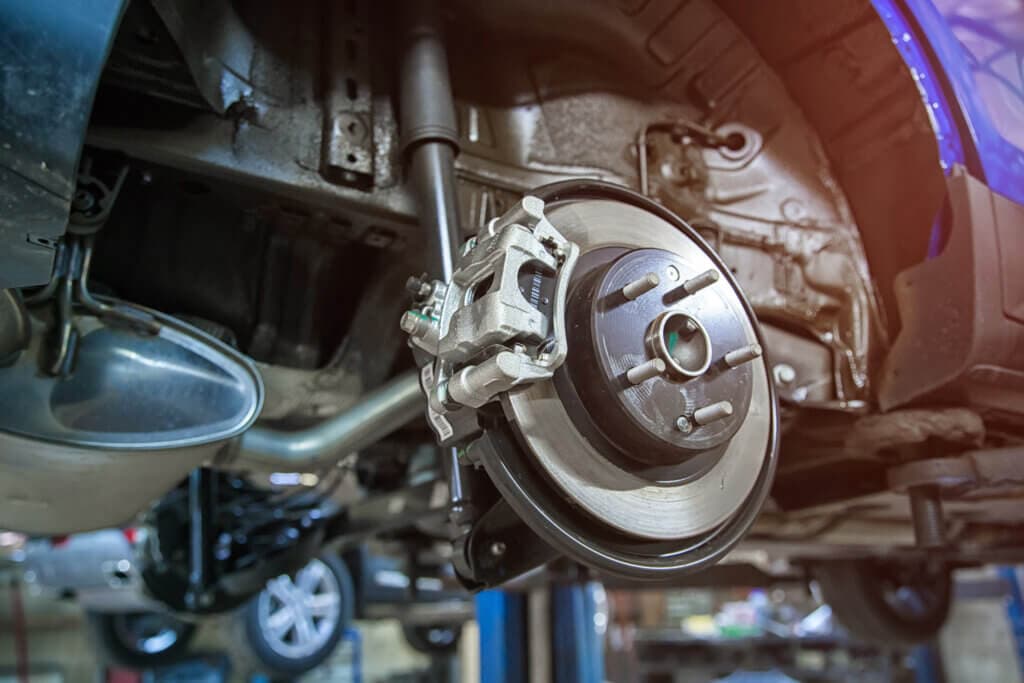
2. Front Brakes
- Truck drivers have to service brakes and ensure that the brake drum and brake lining show no cracks or signs of damage.
- No oil should be leaking from the inner oil seal.
- The slack adjuster should be at the proper angle to the brake chamber. The clevis and cotter pin should be intact.
- Drivers need to make sure that the brake air line shows no bulges or cuts and fits tightly.
3. Front Wheel
- Truck drivers should check tires for abrasions, bulges, and cuts.
- The minimum tread depth should be 1.6 mm.
- Tires need to have a pressure of 120 PSI.
- The wheels should not be cracked or bent.
- If the hub is sealed, drivers can’t check the level. If it is not, the oil should be at an appropriate level and not leaking. The outer oil seal should not be leaking, either.
- The valve cap has to be in place.
- Drivers must make sure that the lug nuts are not missing, are secure, and show no streaks or shiny areas.

4. Driver Side of Engine
- Truck drivers have to ensure that the radiator brace shows no cracks or missing bolts and that the radiator is securely mounted and not leaking.
- The water pump should not be loose or leaking and show no cracks.
- The fuel water separator and filter show no leaks and are securely mounted.
- The pitman arm or drag link is not cracked, and the castle nut is secured with a cotter pin.
- Drivers need to check the steering gearbox to see that it is secured to its frame and not leaking.
- The power steering reservoir is at an appropriate level and shows no leaks.
- The dipstick shows the right level. The driver needs to secure it after every check.
- The steering shaft is also secure and not loose or damaged.
- There is no damage to the fuel pump and it does not show any cracks.
- The clamps on the engine air duct are secure and it does not show cuts.
- The brake master cylinder and the engine coolant reservoir show the correct fluid levels and do not leak.
- Drivers need to check the oil filler cap to ensure that it is secure and has no cracks.

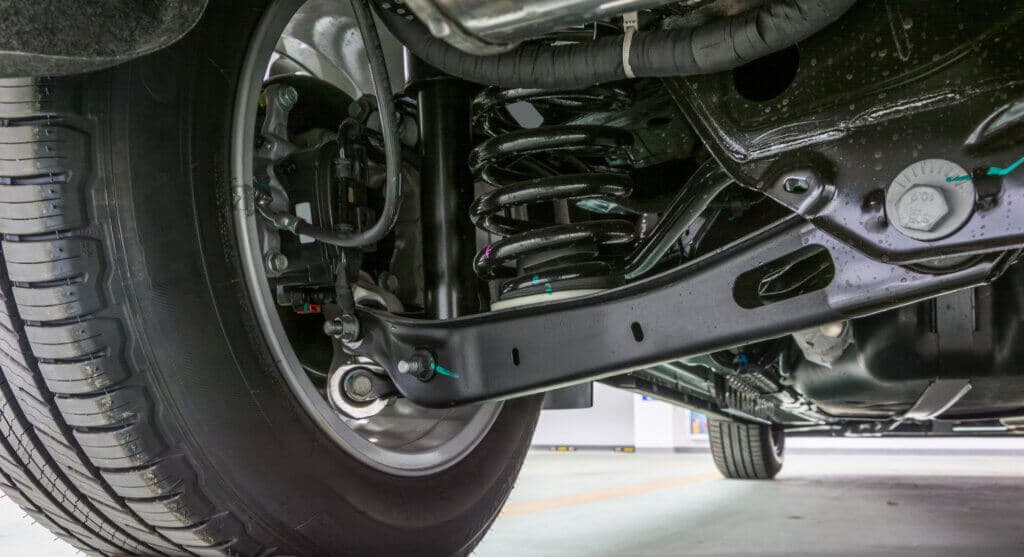
5. Steer Axle Suspension
- The u-bolts are not cracked, loose, or missing their nuts.
- The leak spring does not shift, shows no cracks, and is not loose.
- Truck drivers need to ensure that the tie rod is secure with castle nuts and cotter pins.
- The shock absorbers are securely mounted and not leaking oil.
- The axle shows no cracks.
6. Rear Suspension
- Drivers need to check the spring mount to see that is securely mounted and shows no cracks.
- Just as they did on the front, the rear tires should be checked by the driver for abrasions, bulges, and cuts. Pressure should be 110 PSI and the minimum tread depth is 1.6 mm.
- The shock absorbers are securely mounted and not leaking out.
7. Side of Cab
- Drivers should inspect the mirrors to see that they are securely mounted, clean, and not broken.
- All doors should open and close properly, the hinges need to be secure, and there should not be any damage to doors or windows.
- The lights and signals are all working and not cracked.
- When drivers inspect the steps, they should be mounted properly and secured to the skirting.
- The battery box is securely mounted, and the cover is latched.
- The FED cap is secure.
- The gasket, vent, and chain are in place on the fuel cap and tank.
- The side skirting shoes no damage and the panels are secure.
- Drivers need to make sure that the side box is secured and that safety triangles are present.
- The body of the sleeper berth shows no damage, and the sleeper berth windows have no cracks.

8. Rear of Cab
- When truck drivers are checking the electrical cord, there should be no bare wires or corrosion. The plug at the end of the cord should be intact.
- The airline should not be tangled or worn. The grommets fittings are tight.
- The cab shock absorbers are securely mounted and not leaking oil.
- The cab airbag bellows is securely mounted and not ruptured.
9. Drive Shaft/Rear Frame
- Drivers need to ensure that the drive shaft is not cracked.
- The universal joint does not show cracks, missing bolts, or shiny areas.
- The differential is not leaking oil.
- The frame is straight and does not have non-factory welds.
10. Fifth-wheel Area
- Drivers have to check that the keeper pin and cotter key on the pivot pin are intact.
- The slider lock pins are fully engaged.
- During the inspections, the release arm shows no bent.
- The slider rail and slider stop blocks do not have broken welds or missing bolts.
- The fifth-wheel platform is well-greased and tilted down.
11. Front of Trailer
- The top rail and tracking device have no cracks or collision damage.
- During the pre-trip inspection, clearance lights are working properly.
- The registration is readable.
- The document box is not loose or missing.
- Truck drivers need to ensure that airlines and glad hands have no bulges or cuts, and that the rubber grommets on the glad hands are not damaged.
- The electric hook-up has an intact cover and no broken pins.
- The PM sticker is legible and up to date. The height stickers are legal for the chosen route.
- The placard holder is intact and not missing rivets.
12. Side of Trailer
- Drivers need to check the top rail for cracks and collision damage.
- The clearance lights are operational. The bottom lights are not cracks, show no collision damage, and are not missing bolts.
- The landing gear has no broken welds, the sand pads are secure, and the legs are straight.
- The reflector tape is clean.
- During the pre-trip inspection, placard holder and side panels show no damage and have no missing rivets.

13. Rear of Trailer
- Drivers need to ensure that the latches are secured and not damaged.
- The placard holder is intact and not missing rivets.
- The reflector tape is clean.
- Truckers need to check the lights to make sure they are operational.
- The splash guard’s brackets and guard are secure.
- The license plate is secure and clean, and the light is working.
- The bumper is intact and does not show broken welds.
- Door hooks and hinges are secure, intact, and not missing bolts.
- While checking the door seals, there should be no separation or rubber tubing sticking out.
14. Trailer Suspension
- The airline shows no bulges or cuts and the fittings are tight and not rubbing.
- The axle is neither bent nor broken.
- Drivers need to make sure that clevis pins and cotter key are not missing.
- The slack adjuster is at the proper angle with the clevis pin and cotter pin intact.
- The brake drum is intact.
- Drivers should check tires for abrasions, bulges, and cuts.
- The minimum tread depth should be 1.6 mm.
- Tires need to have a pressure of 110 PSI.
- The spring is not broken or shifted, and sprint mounts show no broken welds.
- While performing a pre-trip inspection, drivers need to make sure that the u-bolts are not cracked or loose.
- The torque rod is securely mounted with the brushing intact.
- The spring brake chamber is also securely mounted with a secured band clamp.
15. Gauges/Inside the Truck
Inside the truck, drivers should check the following readings:
- Tachometer: 1000-1500.
- Water temperature: 180–205 degrees.
- Fuel level should match the visual while looking into the tank.
- DEF level: minimum of one light bar.
- Oil pressure: 25-50 PSI.
- Air pressure: 90-120 PSI.
- Speedometer: 0-60 MPH.

CDL Pre-trip Inspection Video
For more on performing a pre-trip inspection, watch this walkthrough from Driving-Tests.org: “How to perform a CDL Class A Pre-Trip Inspection and pass in 2023.”
Completing a CDL Pre-trip Inspection Process With ToolSense
For drivers already working against a tight schedule, a full CDL pre-trip inspection can feel like a lot of extra work — but it doesn’t have to be a slog for everyone involved. A printable cheat sheet or a pre-trip inspection checklist in PDF format is one way to keep drivers from missing important details. A pre-trip inspection app is another.
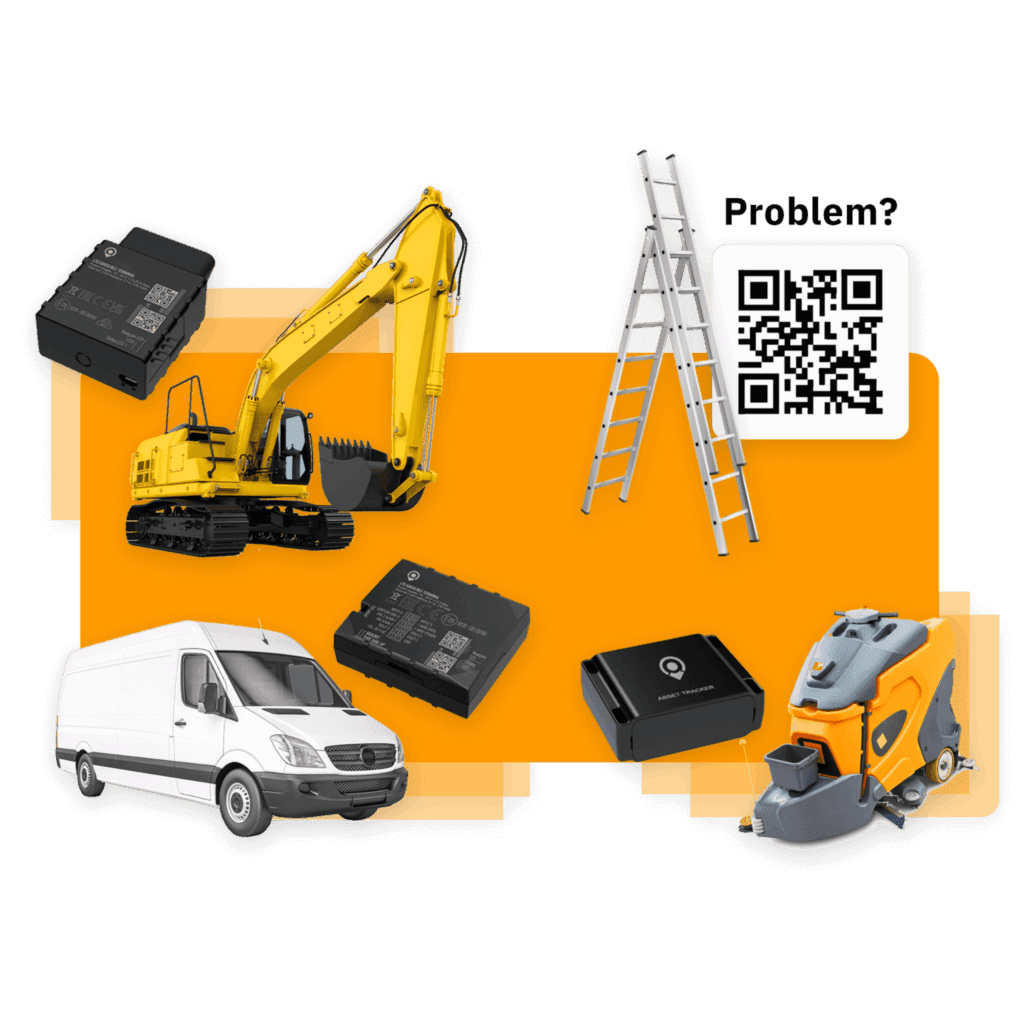
ToolSense is a modern asset and fleet management solution that ships with pre-programmed pre-trip inspection forms and checklists, so drivers can tick off each part as they inspect it. Companies can also build their own custom checklists with a simple form, tailored to the specific vehicle in use. Because the pre-trip inspection software is cloud-based, employees can reach the data from their desk or on the road via smartphone or tablet. CDL pre-trip inspection pictures can be added to a vehicle’s lifecycle folder in the software, giving drivers a clear reference for exactly what to look for.
Checklists and forms are only part of what ToolSense does. Companies can track all of their assets with modern GPS trackers, Bluetooth sensors, or a simple QR code system, keeping an eye on location, runtime, downtime, maintenance history, and work orders related to assets and vehicles. That data flows into the asset management solution and feeds its analytics tools. Every asset and vehicle gets its own lifecycle folder holding information, pictures, videos, and invoices, so everything lives in one place that’s easy for the whole team to reach. Over time, that adds up to higher productivity and real savings in time and money.
FAQ
What is a Pre-trip Inspection?
A pre-trip inspection is a check of any vehicle before it heads out on the road. This ensures that the truck, bus, car, or tractor is in perfect working order, keeps drivers safe, and helps reduce maintenance costs.
What is a Pre-trip Inspection Checklist for Class A CDL?
This checklist is specifically designed for a pre-trip inspection of Class A vehicles and includes brakes, suspension parts, wheels, emergency equipment, lights, and more.
What is a Pre-trip Inspection Checklist for Class B CDL?
Pre-trip inspection Class B checklists were created to inspect vehicles of that class before they hit the road. These can include brakes and air systems, lights, steering, windshield wipers, and more.
What is Pre-trip Inspection Software?
A pre-trip inspection tool or software turns regular inspections into a simple and easy process by providing drivers with the information they need to undertake the inspection. This includes using pre-configured pre-trip inspection checklists or creating custom checklists that drivers can use so as not to forget a single detail about the inspection.